
I started taking photos when I was 10, and have never put my camera down since. I went to college for photography, and have a photography business.
Photography can get pretty technical but with this post, I’m not going to get caught up in the little details; I will explain how I get my portrait photos (that I mainly take on my iPhone) and how you can take photos like them, too.
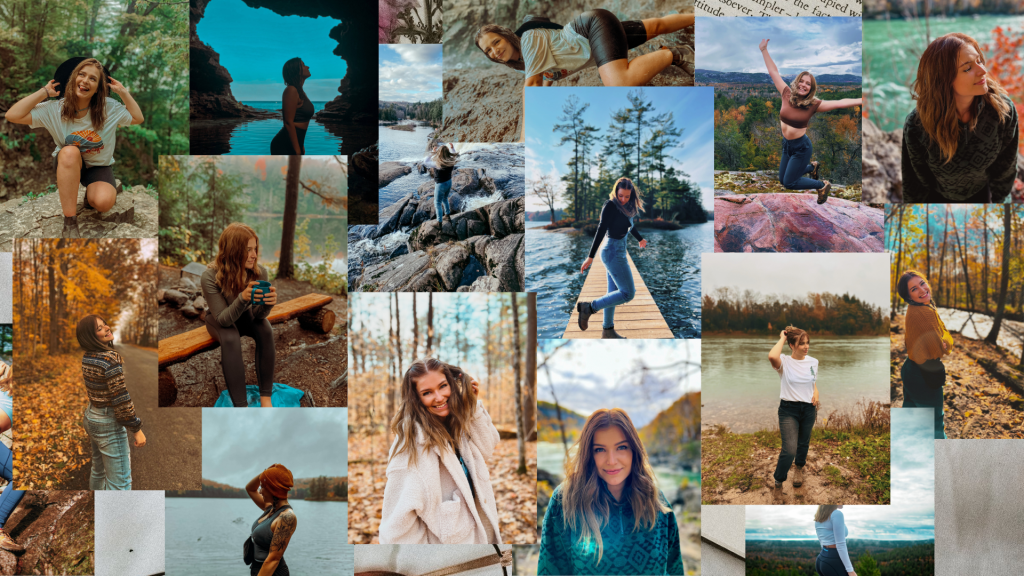
If you follow me on Instagram or Pinterest, you have most likely seen a good number of my photos. But, I don’t often get to talk about what goes on behind the photos! This is a very fun topic for me.
Let’s get in to it.
I’m mainly going to talk about posing, but first I’ll start with tips for taking the photos.
Shooting Portraits (for beginners)
- Play around. This is my first item on the list because I think it’s the most important – play around with everything. Lighting, angles, distance from the subject, movement, editing styles, everything.
- Avoid distracting backgrounds. Sometimes backgrounds can have too much color, shapes, or are just too busy and will distract the viewer from the subject.
- Focus on the subjects’ face. In typical portraits, keep your subjects face as main point of focus for your camera/phone. If you’re doing a close up, focus on their eye.
- The thing closest to the lens will appear the largest. This is a very important thing to note but many people don’t realize – lenses can have some distortion and cause some magnification to body parts. This is one reason many people don’t like photos of them self straight on, as their nose or chin can appear larger than what they are. Another good example of this is if you put your foot closest to the camera and it looks huge compared to the rest of your body.
Posing Guide (for beginners)
I’m going to put a few examples of some of my go-to poses. I am only going to include portraits of one subject to keep it basic.
The first rule of thumb with posing is to pay attention to what the subject does naturally – natural movements capture best, but they usually need a few adjustments!
Pose 1: Stepped on Gum

Pose one is one of my personal favourites! It’s very simple, elegant and appears effortless. For your subject, it’ll probably feel a little uncomfortable. But it’s worth it!
To get this pose:
~ lift the foot closest to the camera up, swing arm closest to camera back and relax the hand, look down at the ground
Avoid:
~ stiff movements (especially in hands)
Pose 2: Look up

This one is so easy to play around with. You can do this one standing or sitting, and at different angles.
Pointers for this pose:
~ make sure chin is out while looking up to avoid chin rolls, allow subject to do what is natural for them, or have arms loosely at their side
~ try giving your subject different instructions such as to gently embrace themself, or to adjust their sleeves
Avoid:
~ shooting too low for this pose
Pose 3: Play with hair
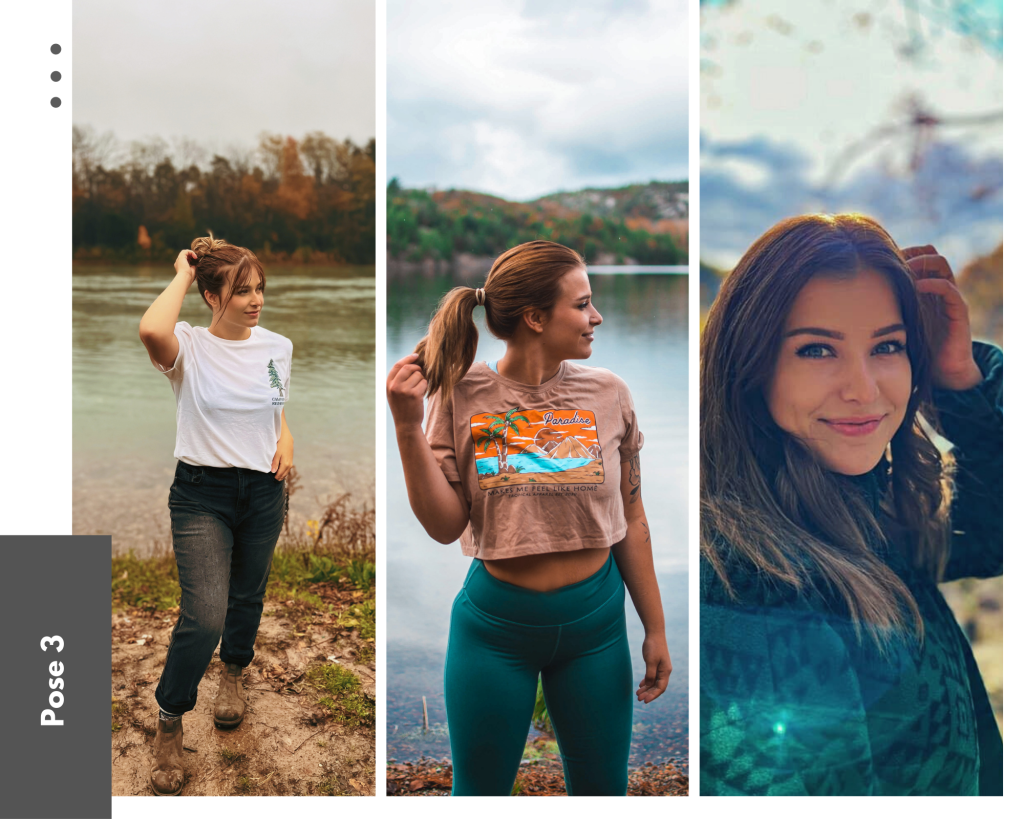
Playing with hair can create so many beautiful portraits (look this up on Pinterest and you’ll see how many different ways there are to do it). It’s also a good way to start your portrait session if you have a subject that isn’t as comfortable in front of the camera.
Tips for this pose:
~ start with subject looking down or to the side while playing with their hair, then have them look at the camera
~ if you do a close up, try not to cut out the arm that is playing with the hair
~ if you want a creative shot, you could get a photo from behind them
Pose 4: Arms open
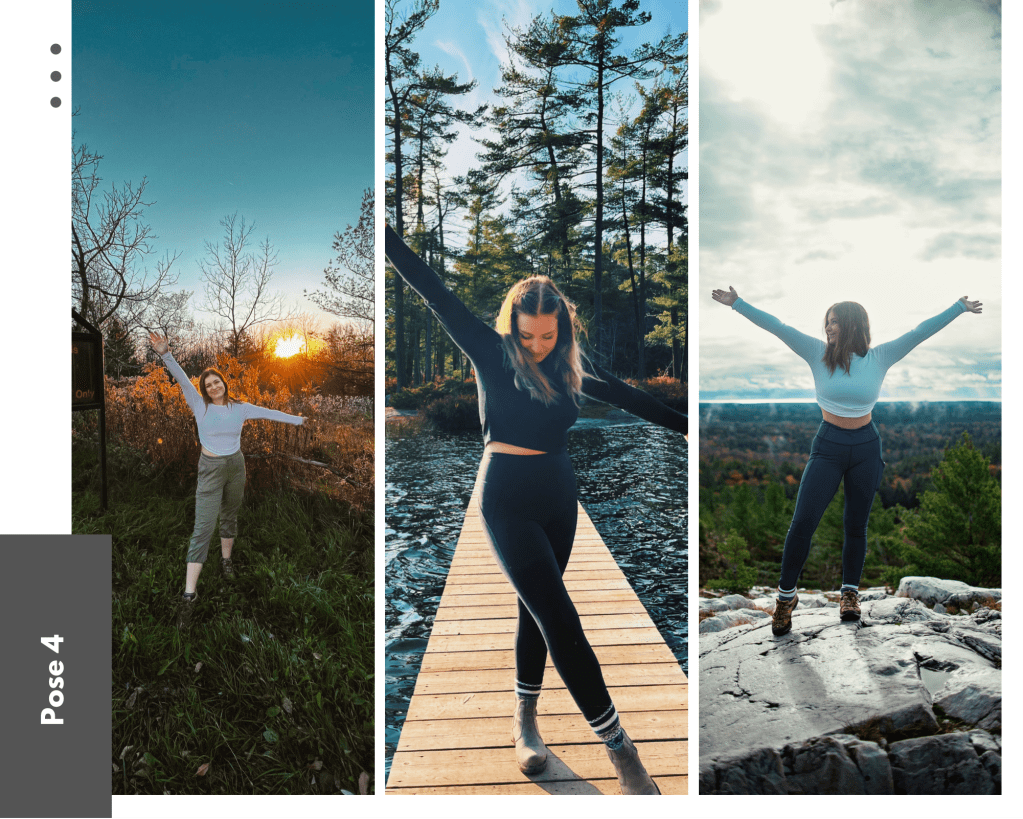
This pose is great when you are doing a wider shot – it can really emphasize the beauty of the landscape around you. It’s a very powerful pose.
Tips for this pose:
~ try shooting farther away from your subject, have subject play with different feet positions (crossed legs or weight in one hip)
Avoid:
~ close up shots (you probably won’t see arms or landscape)
Pose 5: Looking over shoulder
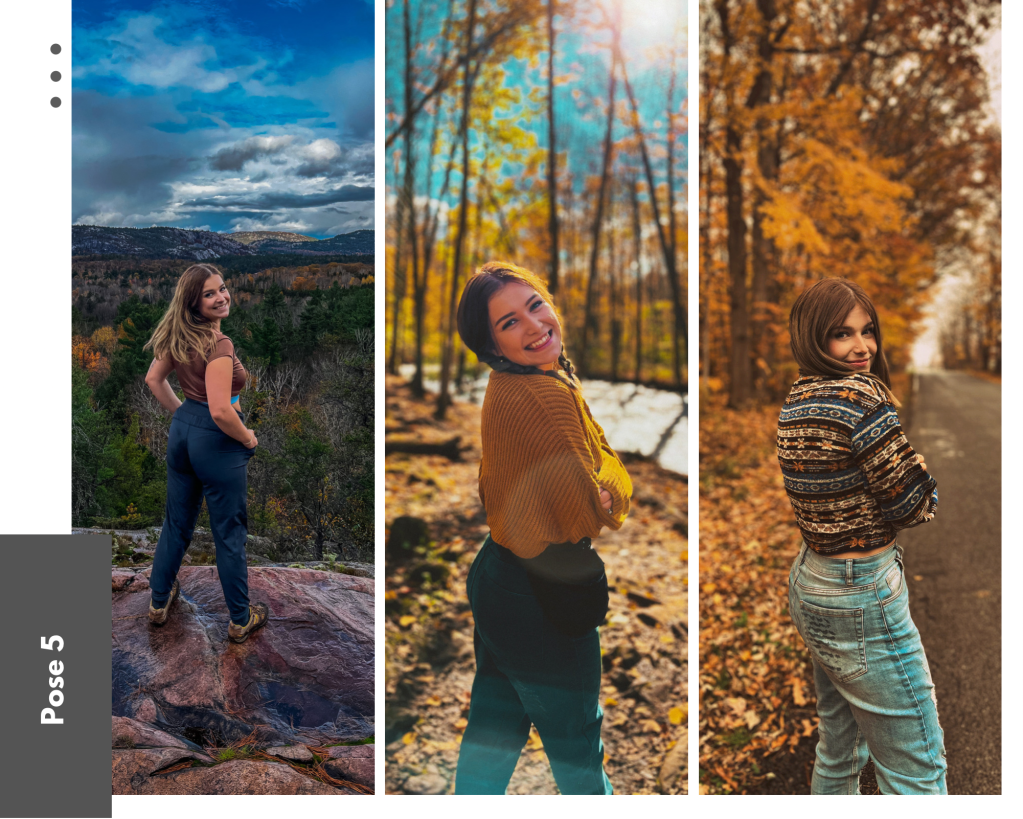
This is my go-to pose. It brings a candid, cute and cozy feel to a photo. I’m surprised my entire Instagram profile isn’t me doing this pose in different places.
Tips for this pose:
~ play with the shoulder closest to the camera being raised and relaxed
~ try having the subject taking a step while they look back, then try having their feet planted while they look back
Avoid:
~ being too far behind the subject so they don’t crank their neck
~ be at eye level or higher for taking this photo
Pose 6: Unposed/Candid

I think candid photos are the perfect “pose” to end on. Candid photos are photos where the subject is just captured in their natural state – no direction, no concern for the camera in front of them. Real life.
Candid photos are the most special to me. They show a glimpse of what was going on in that moment, peoples natural beauty, and positions that are difficult to replicate.
Editing (for beginners)
The best recommendation I have for beginners is to download the app Lightroom Mobile (it’s free!). Lightroom Mobile has all of the editing features you’ll ever need for portraits. It has an option to automatically adjust your photo for you, or you can use presets. I make my own presets so I swear by them, and I think they’re the easiest way to edit batches of photos quickly and beautifully.
I hope this post is useful for someone and that it’s a nice little change from my usual outdoorsy posts! I’ll be back soon talking about my latest adventure.
If you end up using these tips, tag me in your photos! @yourmatiekatie #katieoutdoors

Save this blog on your Pinterest!
Keep on shooting 📸
Kate 🌼

One thought on “Portrait Photography – Beginner Posing & Shooting”